

The single most reliable way to verify a solo-ad vendor testimonial is to set up independent tracking under your control and run a small paid test before committing to a larger order. Never rely on a vendor's own dashboard, screenshots, or word-of-mouth praise alone. Treat every testimonial as a hypothesis, not a guarantee.
Before you spend a dollar, you need three things in place:
- A tracking link you control (ClickMagick or Voluum) sitting between the vendor's email and your squeeze page
- Sub-IDs tagged to this specific vendor and campaign so you can match clicks to opt-ins
- A 100-click test order to generate real, comparable data
Your 10-minute first step: build your tracking link, send it to the vendor, and watch whether they accept it or push back. Refusal is your answer.
Key Takeaways
Independent tracking combined with a small live test is the only reliable method to verify a solo-ad vendor's testimonials, click counts, and traffic quality before scaling your spend.
| Point | Details |
|---|---|
| Independent tracking is mandatory | Set a ClickMagick or Voluum link between the vendor's email and your squeeze page before every campaign. |
| Vendor click gap threshold | Vendor-reported clicks are typically 5–15% higher than independently tracked counts; above 15% demands explanation. |
| Bot rate benchmark | Healthy campaigns show under 8% bot-filtered clicks; above 20% signals low-quality or proxy traffic. |
| Use the 21-question framework | Score vendors on eight key questions before testing; a score below 10 means walk away. |
| Log every test | Record vendor name, click counts, opt-ins, and revenue per click across 3–4 tests to identify reliable vendors. |
Table of Contents
- How to verify vendor testimonials in 30 minutes or less
- Step-by-step: confirm click counts, screenshots, and claimed opt-ins
- Which tracking tools and proof types actually confirm traffic quality
- How to apply the 21-question vendor vetting framework in practice
- How to run a small live verification test
- Common red flags and fake-testimonial tactics to watch for
- If you suspect fraud: document, escalate, and recover
- What I actually do when a vendor sends me testimonials
- Useful resources for your next steps
- Sources
How to verify vendor testimonials in 30 minutes or less
Speed matters when a vendor is pressuring you to buy. This checklist catches obvious fakes before any money changes hands.
- Search for the vendor's name + "solo ads" + "reviews" on Google, Facebook groups, and Reddit. Look for repeat buyers and public discussion threads, not just the vendor's own testimonials page. Balanced public feedback is more credible than a wall of perfect praise.
- Request dated, full-dashboard screenshots showing click counts, opt-in rates, geo splits, and device breakdowns. Cropped or undated images prove nothing.
- Ask for one contactable past buyer you can message directly. A vendor with nothing to hide will have at least one reference willing to confirm results.
- Send your own tracking link and tell the vendor it must be the destination URL in their email. Any hesitation or flat refusal is a red flag that should stop the deal immediately.
- Check the testimonial headshots with a reverse image search (Google Images or TinEye). Stock photos or reused profile pictures signal fabricated social proof.
If the vendor clears steps 1 through 5, you are ready to run a live test. If they fail any one of them, pause and ask for an explanation before proceeding.
Pro Tip: Order a 100-click test as your first purchase. It costs little, generates real data, and tells you more about traffic quality than any screenshot ever will.
Step-by-step: confirm click counts, screenshots, and claimed opt-ins
Validating a vendor's numbers is a repeatable process. Follow these steps in order.
- Set up your tracking link. In ClickMagick or Voluum, create a tracking link that redirects to your squeeze page. Place it between the vendor's email and your landing page. This link captures every click independently, before your page loads.
- Compare click counts. After the campaign, pull your tracker's unique click count and compare it to the vendor's reported number. Vendor-reported numbers are typically somewhat higher than independently tracked human-verified clicks. A gap larger than 15% warrants a direct question.
- Check the bot-filter rate. Healthy campaigns show a low percentage of bot-filtered clicks. If your tracker flags more than 20% as bots or proxy traffic, either your setup is misconfigured or the vendor is sending low-quality traffic.
- Verify opt-ins in your ESP. Tag every subscriber who comes through this campaign with a source label (for example, "vendor-name-date"). Pull your ESP's subscribe log and match the count to your tracker's click-to-opt-in ratio. Cross-reference with Google Analytics real-time or campaign reports to confirm the same sessions appear.
- Evaluate vendor screenshots. Ask for full-dashboard exports, not cropped images. Screenshots without dates, full dashboard context, or matching UTM data are weak evidence. A credible screenshot shows the offer URL, date range, geo breakdown, and device split, all in one unedited view.
- Document discrepancies immediately. If counts differ beyond the 15% threshold, screenshot your tracker data with timestamps, export the click log as a CSV, and send the vendor a written message asking for an explanation. Keep every reply.
| Metric | Acceptable range | Red line |
|---|---|---|
| Vendor vs. tracker click gap | 0–15% | Above 15% |
| Bot-filtered clicks | Low level | Very high level |
| Opt-in rate (cold traffic) | Moderate range | Very low level |
| Geo match (claimed vs. actual) | Within 5% | Off by 10%+ |
Pro Tip: Request a server-side postback or raw click-ID export instead of a screenshot. Postbacks send click data directly to your tracker in real time and cannot be edited after the fact.

Which tracking tools and proof types actually confirm traffic quality
Not all evidence is equal. Here is what to request and what each type actually proves.
- ClickMagick or Voluum click-level exports (CSV): Show individual click IDs, timestamps, IP addresses, geo, and device. This is the highest-proof format for click verification because the data is exportable and cross-referenceable.
- Server-side postbacks: Fire a conversion signal from your landing page or ESP directly to your tracker when an opt-in occurs. Postbacks cannot be faked after the fact and give you real-time opt-in attribution.
- Google Analytics real-time and campaign reports: Confirm that sessions from the vendor's traffic match the clicks your tracker recorded. Look for matching session counts, geo distribution, and device types.
- ESP subscribe logs: Your email platform (ActiveCampaign, GetResponse, AWeber) records every subscriber with a timestamp and source tag. Match this log against your tracker's opt-in events.
- Raw click ID lists: A vendor willing to share their own click-ID log is giving you something you can reconcile line by line against your tracker. Few vendors offer this voluntarily; asking for it reveals how transparent they are.
For a long-term relationship, add postback verification and periodic raw click-ID exports. You can also use a third-party website vetting checklist to cross-check the vendor's site authenticity before you trust any of their hosted proof.
How to apply the 21-question vendor vetting framework in practice
The 21-Question Vendor Vetting Framework from Soloadsguide covers every dimension of vendor credibility. For a first contact, focus on the eight highest-impact questions:
- Will you accept my third-party tracking link as the destination URL?
- Can you show me a dated, full-dashboard screenshot from a campaign in the last 30 days?
- What is your typical opt-in rate for cold traffic to a lead-generation offer?
- How do you build your list, and how often do you mail it?
- What is your refund or replacement policy if clicks fall short?
- Can you provide one contactable past buyer for this type of offer?
- What geo and device mix does your list typically produce?
- Have you run campaigns for offers in my niche recently?
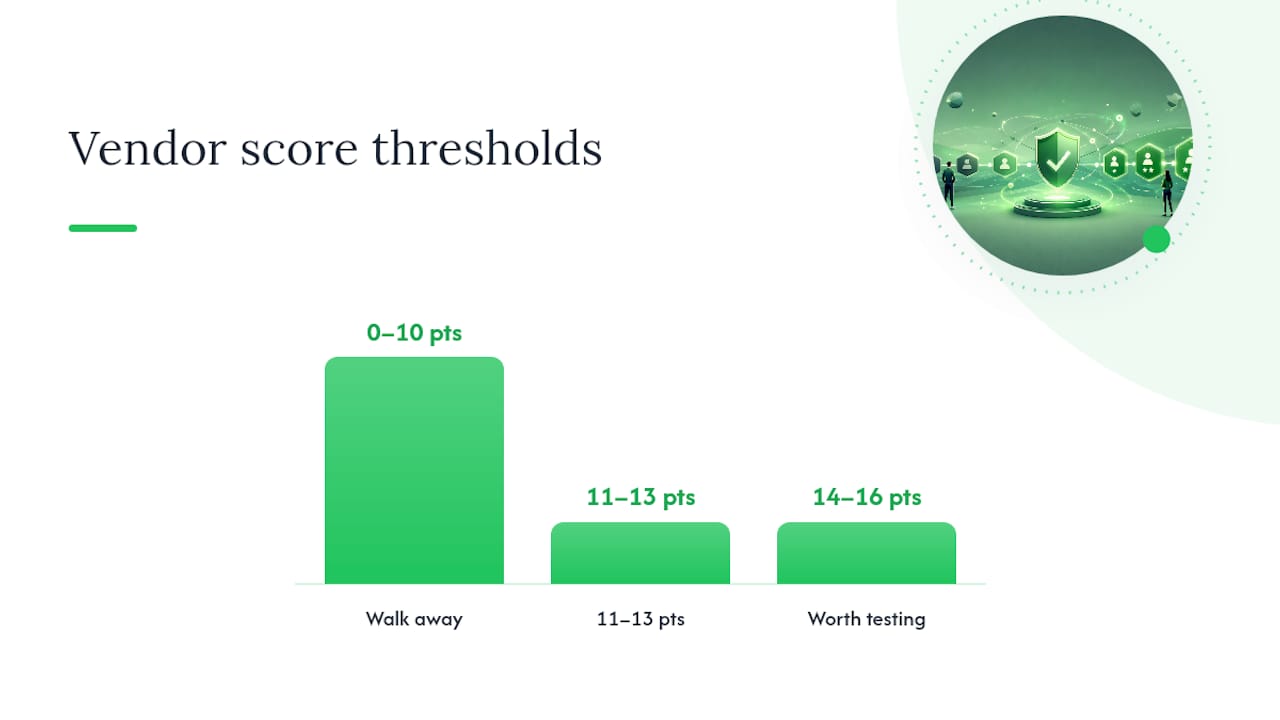
Score each answer: a clear, specific answer with verifiable evidence scores 2 points; a vague but plausible answer scores 1; a refusal, deflection, or implausible claim scores 0. A vendor who scores 14 or above on these eight questions is worth testing. A score of 10 or below means walk away.
Community signals matter too. Repeat buyers and public comments in solo-ad Facebook groups carry more weight than any sales page claim.
How to run a small live verification test
A controlled test turns a vendor's claims into measurable facts. Here is the setup.
- Create a dedicated tracking link in ClickMagick or Voluum with sub-IDs set to capture vendor name (s1), campaign date (s2), and traffic source (s3).
- Point the link to a squeeze page with UTM parameters appended so Google Analytics captures the same sessions.
- Tag all opt-ins in your ESP with a source label specific to this vendor and date.
- Order 100 clicks as your first test. This sample is enough to measure bot rate, geo distribution, and opt-in rate directionally.
KPIs to measure after 100 clicks:
- Independently tracked unique clicks (your tracker, not the vendor's count)
- Bot-filtered click rate (target: under 8%)
- Opt-in rate (benchmark: 30–45% for a well-matched cold traffic offer)
- Geo and device distribution (should match the vendor's stated list profile)
- 30-day revenue per click (track this across 3–4 tests to see a pattern)
At 100 clicks, you have directional data. At 200–300 clicks, patterns become reliable enough to decide whether to scale. Log every result in a vendor spreadsheet: vendor name, date, vendor-reported clicks, your tracked clicks, opt-ins, and 30-day revenue per segment. After three or four tests, honest vendors become obvious. See solo ad conversion rate benchmarks to compare your results against industry norms.
Common red flags and fake-testimonial tactics to watch for
Fake testimonials follow predictable patterns. Knowing them saves money.
- Undated or cropped screenshots: Ask the vendor to scroll the dashboard live on a screen share, or send an unedited export with the date range visible.
- Identical phrasing across multiple testimonials: Copy a sentence from two different testimonials and search it in quotes on Google. Templated praise often surfaces on multiple vendor pages.
- Reused headshots: Run every testimonial photo through Google Images or TinEye. Stock photos or recycled profile pictures are a clear signal of fabricated reviews.
- Refusal to allow your tracker: Ask directly: "Will you use my ClickMagick link as the destination URL?" A legitimate vendor says yes without hesitation.
- Unrealistic opt-in claims: Cold traffic opt-in rates above 55–60% are implausible for most offers. Ask for the specific offer URL and landing page used in the claimed campaign.
- Inconsistent geo or device data: If a vendor claims a US-heavy list but your tracker shows 40% traffic from Southeast Asia, the list profile does not match the pitch.
When you spot a red flag, ask a specific question that forces a verifiable answer. For reused headshots: "Can you connect me with this buyer directly?" For cropped screenshots: "Can you share the full export file, including the date range and offer URL?" For tracker refusal: "What tracking solution do you recommend I use to verify clicks independently?" The answers tell you everything.
You can also check whether the vendor's website itself shows signs of being fake or cloned by using a guide on spotting fake company websites before you trust any hosted case study or testimonial page.
If you suspect fraud: document, escalate, and recover
Act quickly and methodically if something looks wrong after a campaign.
- Screenshot your tracker dashboard with the date and time visible. Export the full click log as a CSV immediately, before any data ages out.
- Export your ESP subscribe log for the campaign period, filtered by the source tag you assigned to this vendor.
- Save all vendor communications in a single folder: emails, chat messages, screenshots of their dashboard, and any refund or replacement promises.
- Request replacement traffic or a refund in writing. Reference your tracker data and the specific discrepancy. A vendor with a legitimate refund policy will respond within 48 hours.
- File a chargeback if the vendor refuses and your payment method allows it. Credit card chargebacks for digital services typically require documentation of the discrepancy, which your tracker export and ESP log provide.
- Report the vendor to solo-ad community groups and Soloadsguide's resources so other buyers have the information.
Give a vendor a second chance only if they provide a credible technical explanation (for example, a tracking misconfiguration on your end that you can independently verify) and offer replacement clicks proactively.
Pro Tip: Keep a "do not use" vendor list in your spreadsheet with the date, the discrepancy, and the outcome. Three months from now, you will not remember the details, and that list protects your budget.
What I actually do when a vendor sends me testimonials
When a vendor sends me their testimonials page, my first three questions are always the same: Will you accept my tracking link? Can you show me a dated full-dashboard screenshot from the last 30 days? And can you give me one buyer I can contact directly? Those three questions filter out most of the vendors who are not worth testing.
If a vendor clears those three, I run a 100-click test with ClickMagick, sub-IDs set to capture vendor name and date, and the opt-in tag active in my ESP. I log the result in my vendor spreadsheet the same day the campaign ends. The spreadsheet caught it because the pattern showed up across two tests, not just one.
The 21-Question Vendor Vetting Framework and the proven vendor testimonial examples on Soloadsguide are the two resources I point buyers to first. The framework gives you the questions; the examples show you what passing answers actually look like.
Useful resources for your next steps
Use these tools and Soloadsguide pages after reading to put the verification process into practice.
- Proven Vendor Testimonials: Examples: Real examples showing what verifiable testimonials look like and what to request.
- Vendor Traffic Source Quality Indicators: Deep dive into geo, device, and IP patterns to cross-check against vendor claims.
- Solo Ad Conversion Rate Benchmarks: Opt-in rate and revenue-per-click benchmarks to compare your test results against.
- Third-party website vetting checklist: Cross-check a vendor's site authenticity before trusting any hosted proof.
After every test, download three files and store them together: your tracker's click export (CSV), your ESP's subscriber log filtered by source tag, and the vendor's reported stats. That folder is your evidence trail and your vendor log in one place.
Sources
- How to Track Solo Ad Clicks Like a Pro (Free Setup) | Ihsan Solo Ads
- Solo Ads Seller Guide 2026 and How to Spot Good Traffic Quality
Recommended
- Proven Vendor Testimonials for Solo Ad Buyers (2026)
- How to Vet Solo Ad Sellers (Before You Spend a Dollar)
- How to Vet Solo Ad Sellers: A 2026 Guide
Want Verified Traffic Without the Guesswork?
PulseTraffic screens every seller, filters bot clicks in real time, and shows you verified buyer traffic labels before you spend a dollar.