

An advanced solo ad vendor vetting checklist is the structured process affiliate marketers use to verify traffic quality, delivery integrity, and vendor transparency before committing real budget. Solo ads, meaning paid email broadcasts sent to a vendor's subscriber list, deliver results only when the list is real, niche-matched, and actively engaged. Without a formal vendor evaluation process, marketers routinely waste hundreds of dollars on clicks that never convert. The 2026 benchmark for healthy solo ad traffic sets opt-in rates at 30%–45%, and any result below 20% signals either poor traffic or a funnel mismatch. Soloadsguide exists specifically to help you avoid that waste.
What does an advanced solo ad vendor vetting checklist require?
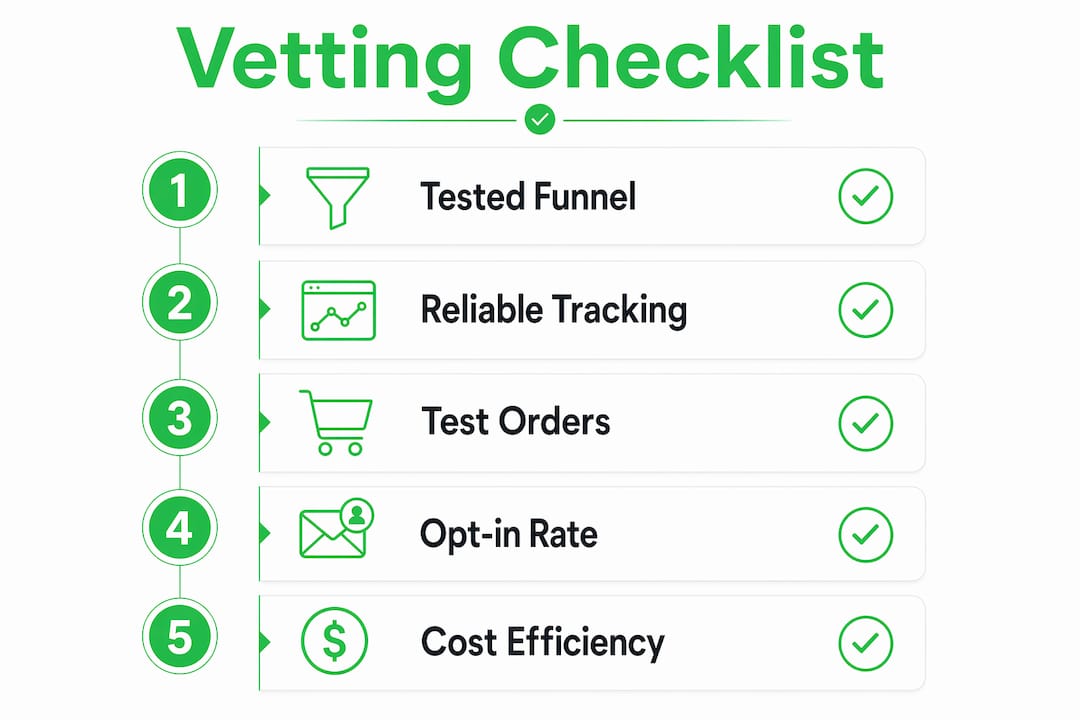
Effective vetting starts before you contact a single vendor. You need three things in place: a tested funnel, reliable tracking software, and a clear definition of success.
Your funnel must be live and proven before you buy traffic. A squeeze page with a strong lead magnet and a headline that matches your email copy is the minimum. If your funnel has never converted cold traffic, you cannot accurately judge a vendor's list quality. Fix the funnel first.

For tracking, tools like ClickMagick and Voluum give you independent click data that does not rely on vendor reports. Independent tracking is non-negotiable because vendor-only screenshots can be manipulated. Set up your tracking link before placing any order.
Define your success metric before spending a dollar. Cost-per-subscriber is the right primary metric, not cost-per-click. A vendor charging $0.50 per click who delivers a 40% opt-in rate is cheaper per lead than a vendor charging $0.35 per click with a 15% opt-in rate. Do the math before you compare prices.
- Tracking tool: ClickMagick or Voluum, configured with a unique campaign link
- Funnel status: Live squeeze page with tested headline and lead magnet
- Test budget: Enough for a 50–100 click test order
- Success metric: Cost-per-subscriber, not cost-per-click
- Campaign goal: Defined opt-in rate target based on industry benchmarks
Pro Tip: Run your funnel through at least one paid traffic source before buying solo ads. Even a small Facebook or Google ad test confirms your page converts cold visitors.
How do you conduct a thorough solo ad vendor vetting?
Vendor evaluation follows a repeatable sequence. Skipping steps costs money. Follow this process every time, regardless of how credible a vendor appears.
-
Request recent campaign tracking screenshots. Ask for anonymized reports from the last 30 days. Look for click totals, unique click percentages, and geo-location breakdowns. A vendor who refuses this request is not worth your time.
-
Place a small test order of 50–100 clicks. Test orders of 50–100 clicks minimize financial risk while generating enough data to evaluate delivery quality. Never start with a 500-click order.
-
Analyze the delivery curve. Healthy traffic spreads clicks over 12–24 hours after your email goes out. A sudden burst of 200 clicks in 20 minutes is a bot signal, not a sign of an engaged list.
-
Cross-verify clicks with your own tracker. Your tracking tool should report within 5% of the vendor's stated click count. Parity within 5% indicates honest reporting. A gap larger than that demands an explanation before you spend more.
-
Check geo-location data. Tier-1 traffic means subscribers from the United States, United Kingdom, Canada, and Australia. If your report shows heavy traffic from countries outside that group, the vendor oversold their Tier-1 percentage.
-
Measure your opt-in rate. Compare your result against the 30%–45% industry benchmark for quality solo ad traffic. A rate below 20% means either the vendor's list is cold or your funnel needs work. Test both variables separately.
-
Calculate cost-per-subscriber. Divide your total spend by the number of opt-ins. Good Tier-1 traffic yields a cost-per-subscriber under $2 on a well-optimized funnel. That number is your real performance indicator.
| Metric | Healthy Range | Warning Sign |
|---|---|---|
| Opt-in rate | 30%–45% | Below 20% |
| Click parity (your tracker vs. vendor) | Within 5% | More than 5% gap |
| Delivery spread | 12–24 hours | Burst under 1 hour |
| Cost-per-subscriber | Under $2 | Over $4 on optimized funnel |
| Tier-1 traffic percentage | 80%+ | Below 60% |
Pro Tip: Always test two different email swipe angles with the same vendor before scaling. The swipe copy affects opt-in rate as much as the list quality does.
What red flags reveal a bad solo ad vendor?
Fraudulent and low-quality vendors share predictable patterns. Recognizing them early protects your budget.
- Prices below $0.30 per click for Tier-1 traffic. Sub-$0.30 pricing is unsustainable given the cost of maintaining an active, niche-specific email list. If the price seems too good, the list quality is the trade-off.
- Identical or generic testimonials. Repeated identical testimonials with stock photos signal fabricated social proof. Real vendor reviews vary in specifics, mention actual niches, and come from verifiable profiles.
- Refusal to review your funnel. Vendors unwilling to review your funnel before accepting your order are not invested in your results. A quality vendor checks funnel fit because their reputation depends on your outcome.
- Pressure to buy in bulk immediately. Urgency tactics like "only 500 clicks left this week" are designed to prevent you from running a test first.
- Niche mismatch. A vendor with a list built around health and wellness cannot deliver converting traffic to a cryptocurrency offer. Always confirm the vendor's list niche matches your offer category.
- Unrealistic performance guarantees. No vendor can guarantee sales. They can deliver clicks to a list. Your funnel and follow-up sequence determine what happens next.
"A vendor who pressures you to skip the test order and go straight to a 500-click package is not confident in their list. They are confident in your impatience. Slow down, run the test, and let the data decide."
How do you interpret vendor metrics and refine your campaigns?
Data from your test order tells you where the problem lives. The answer is almost never "the vendor is bad" or "solo ads don't work." The answer is usually more specific.
Focus on cost-per-subscriber as your primary metric. Cost-per-subscriber integrates both traffic quality and funnel performance, making it a more honest measure than click price alone. A vendor with a higher click price can still deliver a lower acquisition cost if their list is well-matched to your offer.
Message match between your email copy and your landing page headline is the most overlooked conversion factor. If your email promises "a free checklist for affiliate marketers" and your landing page headline reads "Build Your Online Business," you will lose opt-ins that had nothing to do with the vendor's list quality.
- Test multiple swipe angles. Send two different email copy versions to the same vendor across separate orders. Compare opt-in rates to isolate copy performance from list performance.
- Track delivered clicks vs. unique clicks. A high ratio of repeat clicks from the same IP addresses signals low list diversity or bot activity.
- Build vendor relationships over time. Long-term relationships with reliable vendors produce more consistent data and often unlock priority scheduling and better list segments.
- Align your niche and lead magnet. A lead magnet built for email marketers will outperform a generic "make money online" freebie with the same vendor and the same list.
Growing a quality email list through solo ads requires treating each campaign as a data point, not a one-time transaction. The vendors worth scaling with are the ones who produce consistent opt-in rates across multiple test orders.
Key Takeaways
Effective solo ad vendor vetting requires independent tracking, test orders of 50–100 clicks, and cost-per-subscriber analysis to separate real traffic quality from vendor claims.
| Point | Details |
|---|---|
| Start with a tested funnel | Your squeeze page must convert cold traffic before you can fairly evaluate any vendor's list. |
| Use independent tracking | Tools like ClickMagick verify click counts and catch discrepancies the vendor's report may hide. |
| Measure cost-per-subscriber | Divide total spend by opt-ins to find your true acquisition cost, not just cost-per-click. |
| Watch the delivery curve | Clicks spread over 12–24 hours signal real engagement; sudden bursts signal bots. |
| Build vendor relationships | Consistent vendors deliver more reliable data and better results as you scale. |
What I've learned after years of vetting solo ad vendors
The solo ad market has changed significantly over the past few years, and not always in the direction marketers expect. The vendors who were reliable in 2022 are not automatically reliable in 2026. Lists age, engagement drops, and some sellers quietly shift to lower-quality traffic sources without updating their sales page.
The biggest mistake I see affiliate marketers make is treating a single successful test order as proof of a long-term partnership. One good result is a data point. Three consistent results across different offers and swipe angles is a pattern worth scaling.
I have also learned that solo ads work best as experiments, not guarantees. The marketers who succeed with solo ads are the ones who track everything, test systematically, and never blame the vendor for a funnel problem. They also never excuse a vendor for a traffic problem by blaming their funnel.
The vetting process described here is not a one-time exercise. Run it with every new vendor, every time. The market moves fast, and your checklist is the only constant you control.
— Phil
Soloadsguide makes vendor vetting faster and safer
Soloadsguide maintains a curated list of vetted solo ad providers updated for 2026, each evaluated against the same criteria covered in this article. Every vendor on the list has been tested for Tier-1 traffic delivery, opt-in rate performance, and tracking transparency.
You can start with a small test order, review real performance data, and scale only when the numbers justify it. Soloadsguide also provides guidance on funnel readiness and tracking setup so you arrive at your first order fully prepared. The goal is fewer wasted clicks and a lower cost-per-subscriber from your very first campaign.
FAQ
What is a solo ad vendor vetting checklist?
A solo ad vendor vetting checklist is a structured set of criteria used to evaluate a vendor's traffic quality, delivery integrity, and list transparency before purchasing clicks. It typically includes test orders, independent tracking verification, geo-location checks, and opt-in rate analysis.
What opt-in rate should I expect from solo ads?
Industry benchmarks set healthy solo ad opt-in rates at 30%–45%. Rates below 20% usually indicate poor list quality, a funnel mismatch, or both.
How many clicks should I order for a vendor test?
Start with 50–100 clicks per test order. That volume minimizes financial risk while generating enough data to evaluate delivery spread, opt-in rate, and click parity.
Why is cost-per-subscriber more useful than cost-per-click?
Cost-per-subscriber accounts for both click price and opt-in rate, giving you the actual cost of acquiring a lead. A vendor with a higher click price can still deliver a lower cost-per-subscriber if their list converts well.
What does a suspicious delivery curve look like?
A suspicious delivery curve shows a large burst of clicks delivered within minutes of your email going out. Quality vendors spread clicks naturally over 12–24 hours, which reflects real subscriber behavior rather than automated traffic.
Recommended
- How to Vet Solo Ad Sellers (Before You Spend a Dollar)
- How to Vet Solo Ad Sellers: A 2026 Guide
- How to Avoid Solo Ad Scams: 2026 Buyer's Guide
- Best Solo Ads Providers in 2026 (Ranked & Reviewed)
Want Verified Traffic Without the Guesswork?
PulseTraffic screens every seller, filters bot clicks in real time, and shows you verified buyer traffic labels before you spend a dollar.