

The fastest reliable check is to open GTM Preview, filter the Network tab for your pixel endpoint, and confirm the same event lands in the platform's Test Events tool, all in one session. That single pass tells you whether the pixel fired, what data it sent, and whether the platform received it. Keep screenshots and the raw request payload as your evidence trail.
TL;DR:
- Verifying pixel firing requires a single GTM Preview session that confirms the request leaves the browser, receives a 200 response, and lands in the platform's test tool, with matching event IDs for hybrid setups.
- Server-side conversion validation demands checking JSON payload fields like event_time, user_data hashes, and correct data types, as a 200 response does not guarantee field accuracy.
- Testing consent management involves inspecting Network requests pre- and post-acceptance or rejection of cookies, ensuring non-essential pixels stay blocked without leftover requests after rejection.
- Common pixel failures include duplicate firing, misnamed dataLayer variables, and consent re-initialization issues, all fixable through targeted audits and syncs.
- Ongoing pixel verification should be integrated into every deployment, supported by documentation like HAR files and test logs, to catch silent breaks from site updates or code changes before spending budgets or trusting data.
Table of Contents
- Pixel Tracking Verification: A Checklist You Can Run Now
- What Do DevTools and GTM Preview Actually Show You?
- How Do You Validate Server-Side Conversions API Events?
- Are Your Pixels Respecting Consent Before They Fire?
- Which Payload Fields Actually Determine Match Quality?
- How Do You Catch Pixel Failures Before They Cost You Money?
- What Are the Most Common Pixel Failures and Fast Fixes?
- How Does This Connect to Vetting Your Traffic Vendors?
- Verification Isn't a One-Time Task
- Get the Audit Templates and Vendor Vetting Framework
- Reference Docs and Validator Tools
- Sources
- FAQ
Pixel Tracking Verification: A Checklist You Can Run Now
You don't need a full afternoon to know if a pixel is broken. Run these five steps in order, in one sitting, before you touch anything else:
-
Open GTM Preview mode (or your site in an incognito window) and reproduce the exact action you're tracking, whether that's a purchase, a lead form, or a page view.
-
Filter the browser Network tab for pixel endpoints. Look for
facebook.com/tr,google-analytics.com/collect, or whatever endpoint your platform uses. -
Switch to the platform's own test tool. Meta Events Manager's Test Events and GA4 DebugView both show whether the event actually arrived server-side, not just whether your browser sent it.
-
Copy the request payload, screenshot the confirmation, and save the logs somewhere you can find them again. This becomes your audit trail if a vendor or ad platform later disputes what fired.
-
If you're running a hybrid setup with both browser and server events, check that the
event_idmatches on both sides. Mismatched IDs are the number one cause of inflated conversion counts.
This is the core of pixel tracking accuracy work, and it's the same sequence experienced auditors run before trusting any dashboard number.
What Do DevTools and GTM Preview Actually Show You?
Browser tools answer one narrow question well: did the pixel fire, and what did it send from the visitor's machine? That's useful, but it's only half the picture.
Filter the Network tab by image or XHR requests and look at the response code. A 200 OK on a facebook.com/tr request means the browser successfully reached Meta's server. It does not mean the payload was correct, complete, or that the platform processed it as a valid conversion. That distinction trips up a lot of people running their first audit.
GTM Preview mode is often faster than digging through code, because it shows you exactly which tags fired, in what order, and what values populated the dataLayer at that moment. If a tag didn't fire, Preview tells you which trigger condition failed instead of forcing you to guess.
- Use the Network tab to confirm the request left the browser and got an initial response.
- Use GTM Preview to confirm the trigger logic and dataLayer variables were correct.
- Use a pixel helper extension like Meta Ads Data Advisor for a quick visual check, but remember it only sees client-side activity. It's blind to anything happening through the Conversions API on your server.
- Save the HAR file from your Network tab session. It's the most complete record you can hand to a developer or a vendor if a dispute comes up later.
Pro Tip: Don't trust a green checkmark from a browser extension as proof of a working pixel. It confirms the request left your browser, nothing about what happened after that.
How Do You Validate Server-Side Conversions API Events?
Client-side pixels alone miss a growing share of your traffic, thanks to ad blockers, browser privacy settings, and Safari's tracking restrictions. That's why hybrid tracking, pairing a browser pixel with server-side Conversions API events, has become the default setup rather than an advanced option. Server-side implementations capture 85 to 95 percent of events, compared to 70 to 80 percent for client-side-only pixels, which is a meaningful gap when you're making budget decisions off that data.
Validating the server side means pulling the actual JSON payload your server sends, not just checking that the request went through. An HTTP 200 response tells you the connection worked. It does not confirm the fields inside were correct.
- Use a validator like Pixellint to check for required fields, correct timestamp units, and a properly formatted
event_id. Malformed events frequently still return a 200 response, which is exactly why linting matters. - Confirm the
event_idon your server event matches theevent_idon the corresponding browser event, generated at the same business moment. - Check that
event_timeis in seconds, not milliseconds. Wrong units silently push events to a 1970 timestamp that platforms quietly discard.
Are Your Pixels Respecting Consent Before They Fire?
Most marketing pixels legally require user consent before they activate, and consent management platforms should block non-essential trackers until the visitor opts in. Testing this isn't optional anymore. It's part of any real audit.
Run the test in three passes. First, load the page fresh and check the Network tab before touching the consent banner at all. You should see zero non-essential pixel requests. Second, accept the cookie categories and confirm the tags initialize and fire, since some setups need a re-initialization step that developers forget to build. Third, reject or change consent and verify the previously blocked tags stay blocked.
- Pre-consent: open the page, inspect Network immediately, confirm no marketing pixels fire.
- Post-consent (accepted): confirm tags initialize and fire on the next tracked action.
- Post-consent (rejected or changed): confirm suppressed tags stay suppressed, with no lingering requests.
- Log every consent state change and keep the records for your compliance file.
Pro Tip: Test consent behavior in an incognito window each time. Cached consent cookies from a previous test session will give you a false pass.
Which Payload Fields Actually Determine Match Quality?
A pixel that fires correctly can still send garbage. Payload quality is what separates a technically working pixel from one that actually improves your attribution and ad optimization.
Check event_time first. It needs to be a Unix timestamp in seconds and reasonably close to when the action actually happened; a bad unit conversion here quietly corrupts your entire event history. Next, confirm user_data fields like email and phone number are hashed with SHA256 where the platform requires it, and that they're actually present rather than sent as empty strings. Then check that currency, value, and order_id carry the correct type (numbers as numbers, not strings) and that product arrays are populated for purchase events.
- Verify
event_timeis in seconds and falls within a realistic window of the actual event. - Confirm
user_datahashes are correctly formatted and not silently blank. - Check
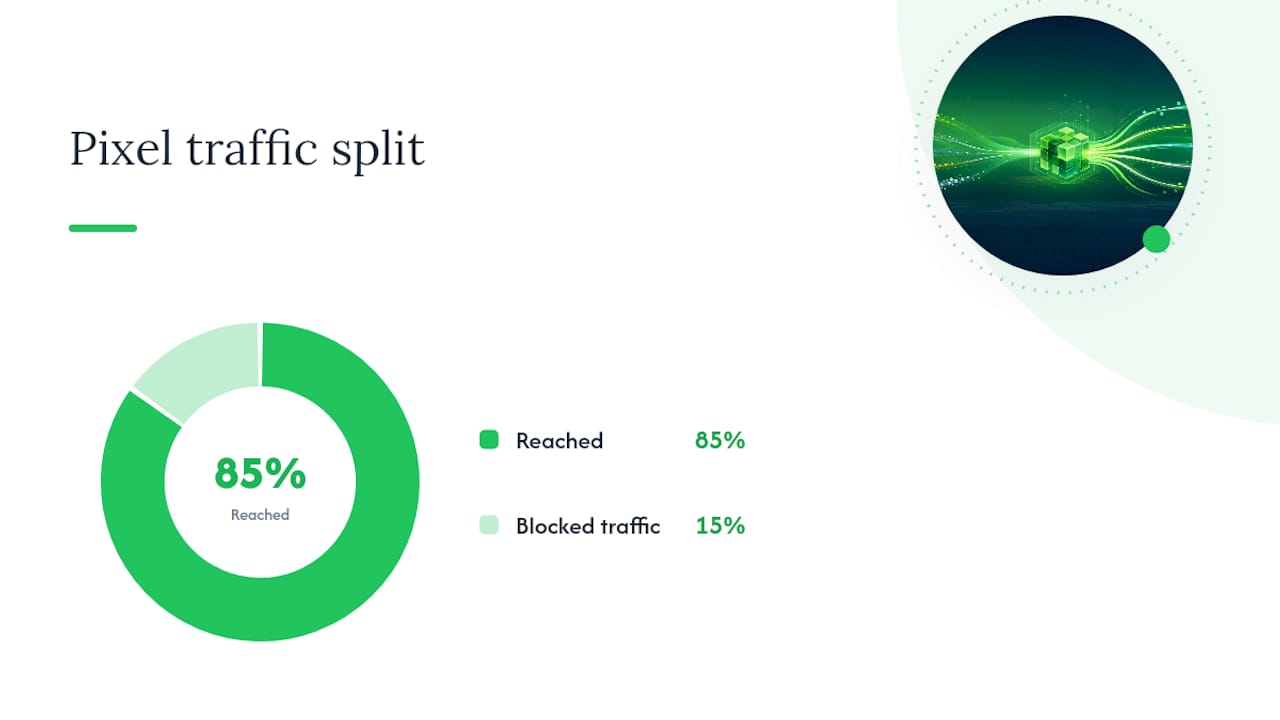
currency,value, andorder_idfor correct data types and non-null values. - Compare GA4 event counts against pixel request counts over the same window to estimate how much traffic is getting blocked before it ever reaches your pixel.
That last comparison is one of the more overlooked pixel tracking best practices. A gap of even 10 to 15 percent between platform counts usually points to ad blockers or browser restrictions rather than a broken pixel, and it's a strong argument for adding the server-side layer described above.
How Do You Catch Pixel Failures Before They Cost You Money?
A pixel that worked last month can break silently the moment a developer redesigns a checkout page or a CMS update changes a button's ID. Manual spot checks won't catch that in time. Automated monitoring that combines visual diffing with network scans catches layout and DOM changes that break triggers before they quietly corrupt weeks of ad data.
- Schedule visual snapshots of key pages and diff them against a baseline; ignore changes under 1 percent, and investigate anything above 5 percent.
- Run a crawler or tag-discovery tool periodically to catch new trackers that got added without anyone telling the marketing team.
- Set alert thresholds on event-quality metrics, not just presence or absence of the tag.
- Write a short runbook for each alert type and assign a specific person to triage it, so alerts don't just pile up unread.
A tool built for this kind of ongoing check, similar to the analytics monitoring approaches covered by Creator Guard, turns pixel verification from a one-time project into a standing process.
What Are the Most Common Pixel Failures and Fast Fixes?
Most broken pixels trace back to one of a handful of repeat offenders. Here's what to check first, in order of how often each one shows up in an audit:
- Duplicate firing. A hardcoded pixel snippet left in the page template alongside a GTM-managed tag double-counts every conversion. Pick one owner, usually GTM, and remove the other.
- Misnamed dataLayer variables. Reproduce the failure in GTM Preview, check what variable name the trigger expects, and map it to what the page actually pushes.
- Deduplication breakage. If client and server events use different logic to generate
event_id, sync the generation method and confirm the sending order matches. - Consent re-initialization failures. Some tag setups need an explicit re-init call after consent is granted; without it, tags stay dormant even after opt-in.
How Does This Connect to Vetting Your Traffic Vendors?
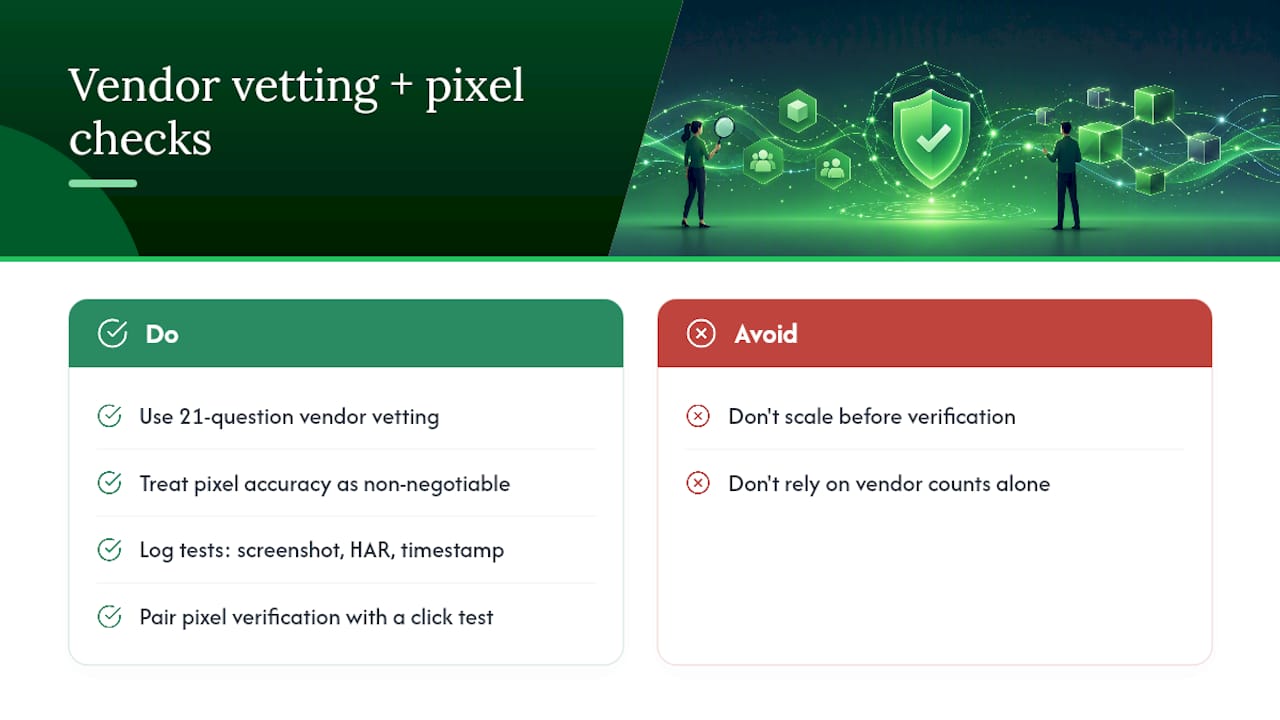
A working pixel is only useful if you trust what it's measuring, and that's exactly where vendor verification and tracking verification meet. A 21-Question Vendor Vetting Framework treats tracking pixel accuracy as non-negotiable evidence before you spend real budget with a solo ad vendor or any paid traffic source.
Document every test: screenshot the Test Events log, save the HAR file, note the timestamp. That record becomes your leverage if a vendor disputes a conversion count or if you need to reconcile a campaign after the fact. Pair pixel verification with a structured click test before scaling spend with any new source, and you catch bad traffic and broken tracking in the same pass instead of discovering both after the invoice clears.
Verification Isn't a One-Time Task
Treat every deploy as a reason to re-run the checklist, not just the initial pixel install. A code push, a CMS update, or a new consent banner can quietly break something that worked fine last week, and the only way you'd know is by checking again before you scale spend.
Document everything. Screenshots, HAR files, and Test Events logs aren't busywork, they're what you hand a vendor when the numbers don't match their claims.
— Philip Coble
Get the Audit Templates and Vendor Vetting Framework
This guide gives you something most tracking guides skip entirely: a direct link between verifying your pixels and verifying the traffic source you're paying for. Most solo ad buyers check their tracking once, trust the vendor's reporting after that, and find out too late the numbers never matched.

The site walks through a 21-Question Vendor Vetting Framework, free audit-friendly checklists, and guides on setting up a tracking dashboard that captures the exact evidence this article recommends: screenshots, HAR files, and Test Events logs, all in one place. If you're about to run a test buy with a new vendor, run your pixel audit first, then use the framework to vet the source itself before you commit real budget. Start with the checklist at Soloadsguide.
Reference Docs and Validator Tools
For hands-on verification, keep these bookmarked: Pixellint for CAPI payload validation, Cookiebot's pixel tracking guide for consent-gating rules, and Trackingplan's pixel audit guide for documentation standards.
Sources
- Marketing pixel monitoring — Trackingplan
- Pixellint — CAPI and pixel validator
- Pixel tracking — Cookiebot
FAQ
Is Pixel Tracking Illegal?
No, pixel tracking itself isn't illegal, but firing pixels before a visitor consents can violate privacy regulations in many jurisdictions. Consent management platforms exist specifically to keep non-essential pixels blocked until the visitor opts in.
Why Are Tracking Pixels Controversial?
Tracking pixels collect behavioral data often without an obvious visual cue, which fuels concerns about surveillance and data resale. The controversy centers on transparency and consent, not the underlying technology.
Can You Tell if an Email Has a Tracking Pixel?
Yes, a hidden 1x1 image embedded in email HTML is the most common method, and you can often spot it by viewing the email's source code and looking for tiny or zero-dimension image tags. Many email clients now block remote image loading by default, which also blocks these pixels.
How Do I Avoid Pixel Tracking?
Blocking remote images in your email client and using a browser extension that blocks third-party trackers stops most pixel tracking. On the website side, a properly configured consent banner should prevent marketing pixels from firing until you actively opt in.
Recommended
- Marketers: Verify Solo Ad Traffic With a 100 to 200 Click Test
- Solo Ad Analytics Dashboard Setup: Verify Before You Pay
- How to Track Solo Ad Traffic (Catch Low-Quality Clicks)
- Fake Proof Solo Ads: How to Verify Before You Buy
Want Verified Traffic Without the Guesswork?
PulseTraffic screens every seller, filters bot clicks in real time, and shows you verified buyer traffic labels before you spend a dollar.