

A targeted email audience is the specific, intentional subset of your subscriber list selected for one campaign based on shared behavior, lifecycle stage, demographics, and consent status — not your entire list. For solo ad buyers, that distinction decides whether paid traffic produces trackable conversions or disappears into a bounce report.
Before you pay a vendor a single dollar, check three things:
- Does the vendor describe their list by behavior and lifecycle stage, not just niche? Demographic labels like "make money online" tell you almost nothing about readiness to buy.
- Can you run your own click-tracking link? If the vendor refuses, the traffic is unverifiable.
- Is there proof of recent engagement? Ask for open and click data from the last 30 days, not a screenshot from six months ago.
Table of Contents
- What counts as a targeted email audience?
- Why behavior + lifecycle targeting outperforms demographic lists
- How do you build a campaign-focused segment for a solo ad test?
- How do you verify audience quality before and after buying solo ads?
- Sample high-impact segments for affiliate offers
- How long does it take to validate a targeted audience?
- What are the most common segmentation and vendor mistakes?
- Key Takeaways
- Why verification is the only honest starting point
- Soloadsguide: practical tools for vetted solo ad buying
- Useful sources
What counts as a targeted email audience?
A targeted email audience is an intentional subset chosen for a specific campaign, not a broadcast to everyone on the list. Three core data types define it:
| Signal Type | What It Measures | Solo Ad Example |
|---|---|---|
| Demographic | Age, location, job title, income band | "US-based, 25–44, interested in online income" |
| Behavioral | Clicks, purchases, page visits, email opens | "Clicked an affiliate offer link in the last 30 days" |
| Lifecycle | Where a contact sits in the buyer journey | "Opted in but never purchased; 14–60 days on list" |
Marketers should start with 2–3 foundational segments and measure ROI before expanding. Consent status and technical environment belong in the signal set too. If a subscriber uses Gmail's Promotions tab or an AI-filtered inbox, the same message can land invisibly for one recipient and prominently for another. Knowing how your email renders for each segment is part of defining the audience, not an afterthought.
Pro Tip: Ask any solo ad vendor which of these three signal types they actually use to build their list. If the answer is only demographic, treat the traffic as untested.
Why behavior + lifecycle targeting outperforms demographic lists
Demographic-only targeting is the most common reason solo ad campaigns flatline. Knowing someone is a 35-year-old American interested in passive income tells you nothing about whether they clicked an offer last week or went cold six months ago.
Affiliate marketers and ecommerce businesses relying on basic demographic data report higher list decay and flatlining ROI compared with those using behavior-plus-lifecycle signals. Behavior-triggered recommendations consistently outperform generic broadcasts in engagement metrics — because they respond to what a subscriber actually did, not who they are on paper.
Consider a simple test: a broadcast send to 1,000 cold demographic contacts versus 500 contacts who clicked a related offer in the last 14 days. The smaller, behavior-filtered group will almost always produce more conversions, even at half the volume. That is the core argument for building your email list around quality signals, not raw size.
Pro Tip: Inserting a subscriber's first name is personalization. Sending a follow-up offer because they clicked a specific link is targeting. Confusing the two is one of the most common mistakes in email marketing.

How do you build a campaign-focused segment for a solo ad test?
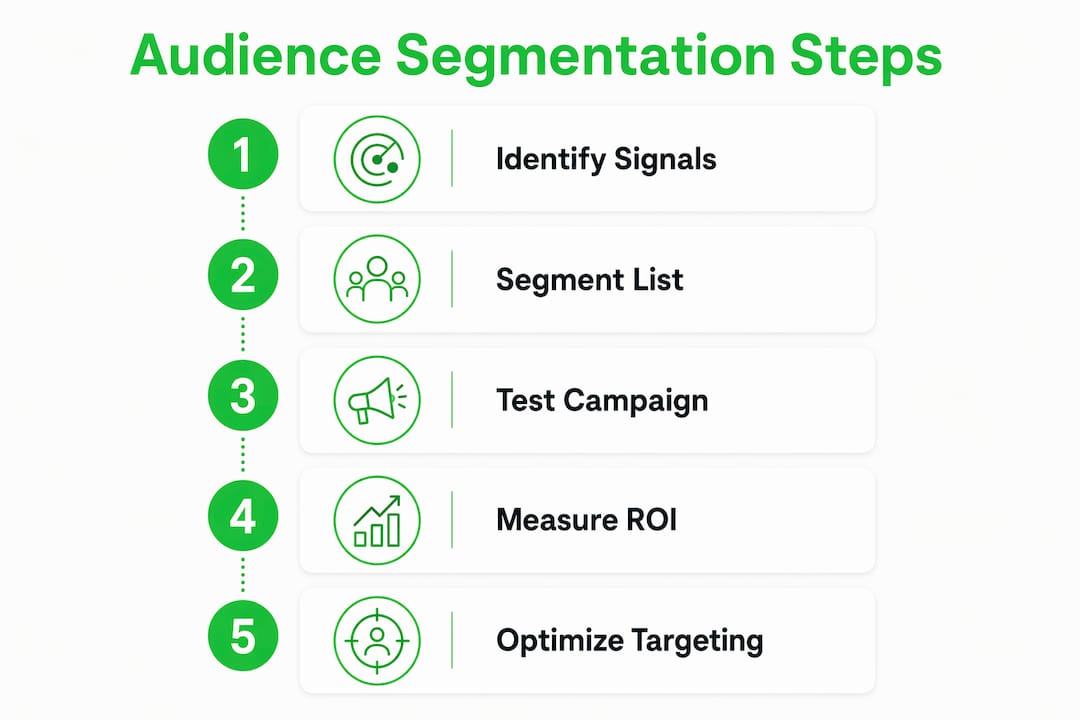
Start with the goal: revenue, activation, or reactivation. Every signal you pick should serve that goal directly.
- Pick 2–3 signals. For a revenue goal, combine behavioral (clicked category X) with lifecycle (on list 14–60 days, no purchase).
- Define inclusion and exclusion rules. Include: clicked affiliate offer in last 14 days. Exclude: already purchased, unsubscribed, or complained.
- Set suppression. Remove anyone who has opted out or hit your spam-complaint threshold. This protects deliverability.
- Map the message to the audience. The subject line and offer should match the behavior that qualified them for the segment.
- Set tracking parameters. Assign a unique UTM string per vendor, a conversion pixel or tracking link, and a minimum sample size before you evaluate results.
Campaign-ready checklist before you buy:
- Tracking pixel or server-side conversion event confirmed firing
- Unique UTM string assigned to this vendor and this send
- Conversion event defined (opt-in, sale, or revenue per click)
- Minimum clicks agreed before drawing conclusions
- Suppression list uploaded and verified
Example segment logic: Clicked "affiliate income" category in last 14 days AND has not purchased in last 90 days AND is not on the unsubscribe list.
Pro Tip: Validate your squeeze page and offer copy with a small internal send before handing the URL to a vendor. If your own list does not convert on it, a cold vendor list will not either.
How do you verify audience quality before and after buying solo ads?
Vendor claims about list quality are unverifiable until you track the traffic yourself. Tracking is non-negotiable.
Minimum tracking setup:
- A unique click-tracking domain or CNAME per vendor (tools like ClickMagick or Voluum work for this)
- UTM parameters per vendor so GA4 or your CRM separates traffic sources
- A server-side conversion pixel or a redirect-based tracking link
- Early-match check: compare clicks reported by the vendor against clicks your tracker records within the first hour
Metrics to watch during a test:
- Raw clicks vs. unique clicks (a high raw-to-unique ratio signals bot traffic)
- On-site conversion rate (opt-in or sale)
- Revenue per click
- Unsubscribe rate and spam-complaint rate after the send
Vendor vetting checklist before you pay:
- Request open and click data from recent sends (last 30 days)
- Ask for a written description of how the list was built and how subscribers opted in
- Confirm suppression practices: do they remove unsubscribes and complainers regularly?
- Negotiate a small paid test (200–500 clicks) before committing to a larger order
- Verify that dynamic segmentation or regular list hygiene is part of their process
Red flags to walk away from:
- Vendor refuses to allow your own tracking link
- Proof of results is screenshots only, with no live data access
- "Guaranteed" conversion rates with no sample data offered
- No clear answer on how subscribers opted in
Pro Tip: Run your tracking link through a bot-detection check before the send. Some vendors pad click counts with automated traffic that passes a basic URL test but never reaches your page.
Sample high-impact segments for affiliate offers
Start with 3–5 segments rather than dozens of micro-segments. Each segment needs a distinct message and a metric you can actually measure.
| Segment | Subject Line Angle | Primary KPI |
|---|---|---|
| Engaged non-buyers (clicked, no purchase, 14 days) | "Still thinking it over? Here's what you missed" | Opt-in rate / revenue per click |
| Recent clickers (last 14 days, any offer) | "You showed interest — here's the next step" | Click-to-conversion rate |
| Previous buyers (cross-sell opportunity) | "Since you grabbed X, you'll want to see this" | Revenue per click |
| Long-inactive (90+ days, no open) | "We haven't heard from you — one last thing" | Reactivation rate |
| Geo-targeted (US only, specific state or region) | "This offer is only available in [region]" | Lead capture rate |
Match each segment to one business outcome before you write a single word of copy. Segmentation without a content plan wastes effort and muddies your results.
How long does it take to validate a targeted audience?
Expect a 2–14 day window for a meaningful test, depending on your offer's conversion rate and price point.
- Day 0: Confirm tracking fires correctly. Do not release traffic until every pixel and UTM is verified.
- Days 1–3: Review early traffic quality. Check unique vs. raw click ratio and on-site bounce rate. Pause if bot signals appear.
- Days 4–14: Let the conversion window close. Most affiliate opt-in offers convert within 72 hours of the click; higher-ticket offers may need the full two weeks.
- Day 14 (decision point): Calculate revenue per click. Scale only if the number is positive and consistent across at least 300–500 clicks.
A conservative test budget covers 300–500 clicks at the vendor's stated rate. For email traffic profit margin benchmarks by vertical, check Soloadsguide's dedicated guide. High-ticket offers need larger samples; low-ticket or free opt-in offers can show signal faster. Never scale a vendor before hitting a positive revenue-per-click figure on a tracked test.
What are the most common segmentation and vendor mistakes?
The biggest mistakes are over-segmentation, confusing personalization with targeting, and skipping tracking entirely.
- Over-segmenting before you have data. Building 15 micro-segments with no unique copy for each produces the same result as a broadcast. Start with 3–5.
- Treating name insertion as targeting. Adding "Hi [First Name]" is cosmetic. Real targeting means the offer matches the subscriber's behavior.
- Skipping pre-send tracking verification. If your pixel is not firing before traffic arrives, you have no data to act on.
- Accepting vendor screenshots as proof. Screenshots are not auditable. Require live tracking access or walk away.
- Scaling before the test window closes. Buying 5,000 clicks before 500 have converted is how budgets disappear.
Pro Tip: If a vendor pushes back on any of these verification steps, that resistance is the answer. Legitimate vendors with quality lists have no reason to block your tracking.
Key Takeaways
Targeted email audiences built on behavior and lifecycle signals consistently outperform demographic-only lists, and for solo ad buyers, verified tracking is the only way to confirm that quality before scaling.
| Point | Details |
|---|---|
| Definition matters | A targeted audience is a behavior-filtered subset, not a niche label or a full list. |
| Behavior beats demographics | Lifecycle and behavioral signals predict readiness; demographic labels alone do not. |
| Track before you spend | Set up UTM parameters, a conversion pixel, and a unique click-tracking link before releasing any traffic. |
| Test conservatively | Run a moderate number of tracked clicks before deciding to scale a vendor relationship. |
| Soloadsguide resources | Use the 21-Question Vendor Vetting Framework at Soloadsguide to vet vendors before buying. |
Why verification is the only honest starting point
Most solo ad vendors lead with their best-case results. That is not dishonest by itself — but it is not evidence either. The buyer's job is to require proof, not accept claims.
After 11 years in the solo ads industry, the pattern is consistent: buyers who skip tracking on the first test almost always regret it. Not because every vendor is bad, but because there is no way to tell the difference between a good vendor and a bad one without data. A targeted audience claim is just a claim until your tracker confirms the clicks are real, the opt-in rate is measurable, and the revenue per click is positive.
The 21-Question Vendor Vetting Framework at Soloadsguide exists for exactly this reason. It gives buyers a structured way to ask the right questions before money changes hands. Pair it with the tracking guides on the site, and you have a repeatable process instead of a gamble.
Soloadsguide: practical tools for vetted solo ad buying
Knowing what a targeted email audience is gets you halfway there. The other half is having a process to verify that the vendor you are about to pay actually has one.
Soloadsguide is built for affiliate marketers and online business owners who want to buy solo ad traffic without relying on vendor promises. The site's 21-question vetting framework gives you a structured checklist to run before any purchase, and the tracking guides walk you through setting up click verification from scratch. The email segmentation guide covers segment-building workflows you can apply to your next test immediately.
Traffic results vary by offer, niche, and vendor. No traffic source guarantees conversions.
Visit Soloadsguide.com to download the vetting framework and review the tracking setup guides before your next buy.
Useful sources
Use these sources to verify claims in this guide and to support your own vendor vetting process:
- Email Target Audience: Key Features and Use Cases — Wizbrand: definition and signal categories for targeted email audiences
- Target Audience for Email Marketing: 2026 Guide — Prospeo: behavior-plus-lifecycle targeting and dynamic segmentation practices
- Email Marketing Target Audience — Email Developer: segmentation scope, rendering environment, and over-segmentation risks
- What Is Targeted Email Marketing? — GlockApps: personalization vs. targeting distinction and behavior-triggered content
- How to Segment Your Email List — Mailchimp: practical segmentation criteria and ROI impact
- SoloAdsGuide.com — 21-Question Vendor Vetting Framework and tracking guides for solo ad buyers
When vetting a vendor, cross-reference their list description against the behavioral and lifecycle signal definitions in these sources. If their description does not map to any of those signal types, ask why before you buy.
Recommended
- Solo Ad vs Email Marketing Difference Explained
- Why Marketers Buy Email Traffic: A 2026 Guide
- Why Marketers Buy Email Traffic: A 2026 Guide
- Role of Email List in Solo Ads: 2026 Guide | SoloAdsGuide
Want Verified Traffic Without the Guesswork?
PulseTraffic screens every seller, filters bot clicks in real time, and shows you verified buyer traffic labels before you spend a dollar.