

Auditing your solo-ad spend is the single most reliable way to protect your budget, verify what you actually received, and build the data you need to scale with confidence. A proper audit covers five core areas:
- Vendor vetting using Soloadsguide's 21-Question Vendor Vetting Framework before any money changes hands
- Independent click tracking through a tool you control, such as ClickMagick
- UTM parameter setup in Google Analytics to attribute opt-ins and revenue by source
- Live delivery verification — timestamps, IP distribution, unique vs. raw click counts
- Post-delivery documentation for disputes, refunds, and vendor scorecards
Pro Tip: Set up your ClickMagick tracking link and UTM parameters before you place the order. A tracker you activate after delivery cannot capture the data you need.
Table of Contents
- Why auditing solo-ad spend actually improves campaign outcomes
- When should you run an audit?
- Step-by-step solo-ad audit workflow
- How do you detect fraud in solo-ad traffic?
- What KPIs should you track for solo ads?
- Which tools do you need to run a solo-ad audit?
- How do you document evidence and claim a refund?
- What do you say when vendors push back?
- Your one-page audit checklist
- Key Takeaways
- The audit is the leverage most buyers never use
- Soloadsguide has the tools to run every audit step
- Useful sources and further reading
Why auditing solo-ad spend actually improves campaign outcomes
The direct financial case is straightforward. Vendor-reported click counts commonly differ from independently tracked counts by 5–15%, with vendor figures typically higher; a variance beyond ~25% is a clear red flag. Without your own tracker, you are paying for a number you cannot verify. An audit closes that gap.
Beyond catching overreported clicks, audits surface three other improvements most buyers overlook:
- Refund recovery. Documented discrepancies give you the evidence to request replacement clicks or a partial refund. Undocumented complaints rarely succeed.
- Vendor scoring. Tracking opt-in rate, earnings per click (EPC), and bot-filtered share across multiple vendors lets you rank them objectively and concentrate spend on the top performers.
- Funnel diagnostics. A low opt-in rate on a vendor with clean traffic usually means your squeeze page is the problem, not the traffic. Audits separate vendor quality from funnel quality.
Pro Tip: Auditing is not only a fraud-detection exercise. When traffic quality checks out but conversions are low, the audit data points directly at your offer or landing page.
Solo ads offer predictable cost-per-click and fast access to warm email audiences, but vendor quality drives outcomes. Tracking and offer fit are what determine whether a campaign is profitable.
When should you run an audit?
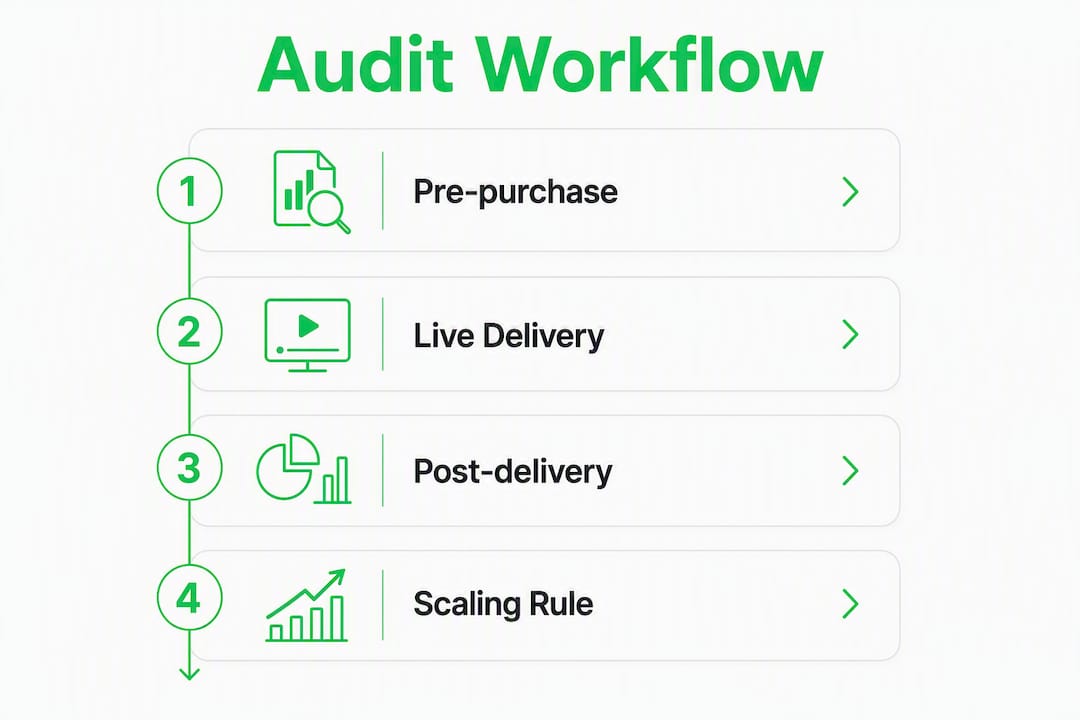
Timing matters as much as method. Here is the cadence that works:
Pre-purchase: Vet the seller before any payment. Check their digital footprint, public reviews, and repeat buyer history. A trustworthy seller shows consistent communication and repeat buyers, not just a polished sales page.
Live delivery (first 24 hours): Watch your tracker in real time. Look for burst patterns, geo mix, and the ratio of unique to raw clicks.

Post-delivery (24–72 hours after): Finalize your click comparison, calculate opt-in rate and EPC, and flag any anomalies. Run a 30-day revenue check to capture delayed conversions.
Scaling rule: Move from 300 to 600 to 1,200 clicks only after opt-in rate and EPC stay consistent across at least two test batches.
Step-by-step solo-ad audit workflow
Phase 1: Pre-purchase vetting
Veteran practitioners agree that the most important vetting happens before purchase. Work through the 21-Question Vendor Vetting Framework from Soloadsguide's advanced vetting checklist. Key items include:
- Does the vendor allow third-party tracking links?
- Can they show recent buyer testimonials with dates?
- What is their stated Tier-1 percentage, and how do they define it?
- What is their refund or replacement policy in writing?
- Do they have an active presence in solo-ad communities with verifiable reviews?
Phase 2: Tracking setup before delivery
- Create a ClickMagick tracking link that redirects to your squeeze page.
- Append UTM parameters:
utm_source=soload&utm_medium=email&utm_campaign=vendorname. - Enable bot filtering and unique-click deduplication in ClickMagick.
- Set all timezones (tracker, autoresponder, server) to UTC.
- Confirm the vendor accepts your tracking link before finalizing the order.
Pro Tip: Third-party tracking is non-negotiable. A vendor who refuses your link before delivery is telling you something important.
Phase 3: Live verification during delivery
Monitor your ClickMagick dashboard during the first few hours. Watch for:
- Bursts of hundreds of clicks in under 10 minutes (a primary bot signal)
- IP clustering — many clicks from the same subnet
- Geo mismatch — promised Tier-1 traffic arriving mostly from Tier-2 or Tier-3 countries
- Raw click count running significantly ahead of unique clicks
Phase 4: Post-delivery analysis
Log these five numbers for every campaign:
| Data Point | What to Record |
|---|---|
| Vendor name + date | For your scorecard |
| Vendor-reported clicks | From their dashboard |
| Independently tracked clicks | From ClickMagick |
| Opt-ins | From your autoresponder |
| 30-day revenue | From your affiliate dashboard |
Compare vendor-reported vs. tracked clicks. A difference of 5–15% is common; variance above 25% signals a serious problem. Calculate EPC as total revenue divided by independently tracked clicks, not vendor-reported clicks.
Experts recommend a moderate number of clicks per test as the minimum to gather reliable data before scaling. Decisions made on too few clicks are statistically unreliable.
How do you detect fraud in solo-ad traffic?
The clearest fraud signals are behavioral, not just numerical.
- Refusal of third-party tracking. Industry experts treat this as a primary red flag because it removes objective verification entirely.
- Identical timestamps. Dozens of clicks logged at the exact same second indicate automated delivery.
- Burst patterns. A sudden high-volume burst in under 5–10 minutes is a major red flag for artificial traffic, regardless of what the vendor claims.
- IP clustering. Multiple clicks from the same IP block within minutes.
- Bot-filtered share above 8–15%. ClickMagick's bot filter flags non-human user agents; a high filtered share warrants a direct conversation.
When you spot these signals, request raw timestamped logs from the vendor before escalating. Many disputes resolve faster when you present exact timestamps and IP samples rather than a general complaint.
What KPIs should you track for solo ads?
| Tracker vs. vendor click count | Delivery accuracy | Vendor-reported counts are typically 5–15% higher than independently tracked counts; a variance above 25% is a red flag. | Bot-filtered share | Traffic cleanliness | At a low level. | Opt-in rate | List responsiveness | A moderate to high level on tight squeeze pages | | EPC (earnings per click) | Profitability per click | Varies by niche; build your own baseline | | Tier-1 percentage | Audience geography | Per vendor agreement | | Refund/replacement rate | Vendor reliability | Low or minimal |
Build vendor-specific baselines after 3–4 tests. Generic benchmarks are starting points; your niche and funnel will shift the numbers. The solo ads performance benchmarks guide on Soloadsguide covers niche-specific ranges in more detail.
Which tools do you need to run a solo-ad audit?
ClickMagick is the standard for click-level tracking in solo ads. Configure it with bot filtering on, UTC timezone, sub-ID enabled (use vendorname_date as your sub-ID convention), geo logging active, and unique-click deduplication on.
Google Analytics with UTM parameters gives you session-level data and connects clicks to opt-ins and revenue in your funnel reports. A copyable UTM template:
https://yoursqueezepage.com?utm_source=soload&utm_medium=email&utm_campaign=vendorname&utm_content=300clicks
Your autoresponder (ActiveCampaign, GetResponse, AWeber) should tag every subscriber with the vendor source so you can measure list quality over 30 days.
A vendor scorecard spreadsheet with columns for vendor name, date, vendor clicks, tracked clicks, opt-ins, EPC, and notes is all you need to build reliable baselines.
Pre-buy checklist — finish all of these before clicking "buy":
- ClickMagick link created and tested
- UTM parameters appended and verified
- Vendor has confirmed they accept your tracking link
- Autoresponder tag set for this vendor
- Baseline funnel conversion rate known from prior traffic
Platforms can help with filtering, but a buyer-controlled tracker is the only way to produce vendor-level evidence for disputes.
How do you document evidence and claim a refund?
Collect this before you contact the vendor:
- ClickMagick screenshot showing tracked unique clicks vs. raw clicks
- Vendor dashboard screenshot showing their reported count
- Timestamped delivery pattern (export from ClickMagick)
- IP and user-agent samples for clustered or suspicious clicks
- Autoresponder opt-in count with source tag
Format your evidence as a simple spreadsheet plus time-stamped PDF screenshots. Your opening message should read: "I ordered X clicks, your dashboard shows Y, my independent tracker shows Z unique clicks. Here are the timestamps and IP samples."
Escalate to the platform or payment dispute only after the vendor has not responded within 48–72 hours or has refused to engage with the evidence.
Pro Tip: Never delete screenshots or tracker exports. Store them in a dated folder by vendor. If a dispute reaches a payment processor, timestamped evidence is what wins.
What do you say when vendors push back?
Common objection: "Our dashboard is the only accurate source of truth."
Your response: "I understand your system tracks differently, but I need an independently verified count to confirm delivery. A 5–15% variance is normal and expected. Can you share your raw send logs so we can compare?"
Common objection: "We don't allow third-party tracking links."
Your response: "Third-party tracking is a standard buyer requirement. Without it, I'm unable to verify delivery independently. I'll need to hold this order until we can agree on a tracking method."
Refund/replacement request template:
Keep the language factual and calm. Emotional escalation rarely speeds resolution. If the vendor does not respond within 72 hours, escalate to the platform or open a payment dispute with your evidence package ready.
Pro Tip: Review the pre-purchase questions guide on Soloadsguide before your first conversation with any new vendor. Knowing what to ask upfront prevents most disputes.
Your one-page audit checklist
Pre-purchase
- Vendor allows third-party tracking — confirmed in writing
- Public reviews checked (recent, dated, with offer context)
- Repeat buyer history verified
- Refund/replacement policy confirmed
- Tier-1 percentage defined and agreed
Tracking setup
- ClickMagick link created, bot filter on, UTC timezone set
- UTM parameters appended and tested
- Autoresponder tag configured for this vendor
- Baseline funnel conversion rate documented
Live monitoring
- Check tracker every 2–4 hours during delivery
- Flag any burst of hundreds of clicks in under 10 minutes
- Monitor unique vs. raw click ratio
- Note geo distribution vs. vendor's stated Tier-1 percentage
Post-delivery verification
- Compare vendor count vs. tracker count (flag if variance exceeds 25%)
- Calculate opt-in rate and EPC
- Run 30-day revenue attribution
- Update vendor scorecard
Escalation steps
- Contact vendor with evidence within 48 hours of delivery
- Allow 48–72 hours for vendor response
- Escalate to platform if no resolution
- Open payment dispute with full evidence package if needed
Pro Tip: Attach this checklist to your vendor scorecard spreadsheet so every buy follows the same process.
Key Takeaways
A solo-ad audit protects your budget and improves ROI by verifying delivery, filtering bots, and creating the documented evidence you need to claim refunds and scale with confidence.
| Point | Details |
|---|---|
| Track independently first | Set up ClickMagick and UTM parameters before placing any order. |
| Use the 5–15% variance rule | Flag vendor-reported counts that exceed your tracker by more than 15%; a variance above 25% is a red flag. |
| Minimum 300 clicks per test | Smaller samples produce unreliable EPC and opt-in data. |
| Build vendor scorecards | Log five data points per campaign to build baselines after 3–4 tests. |
| Soloadsguide's vetting framework | Apply the 21-Question Vendor Vetting Framework before every new vendor buy. |
The audit is the leverage most buyers never use
Most solo-ad buyers skip the audit because it feels like extra work after the money is already spent. That framing is backwards. The audit is what gives you leverage over vendors who know most buyers will never check. When vendors understand that you track independently, compare counts, and document discrepancies, they price quality into their delivery. The ones who can't meet that standard self-select out of your vendor list quickly.
Eleven years in this industry makes one thing clear: the buyers who consistently get good traffic are not luckier than everyone else. They vet before buying, track everything, and dispute when the numbers don't match. That process is not complicated, but it requires doing it every single time, not just when something feels wrong.
The one pro tip worth repeating: stop testing a vendor after two buys with below-benchmark opt-in rates and no credible explanation. Some vendors have good lists for certain niches and weak lists for others. Two data points is enough to know which category you're in.
Soloadsguide has the tools to run every audit step
Soloadsguide gives solo-ad buyers the exact resources this workflow requires: the 21-Question Vendor Vetting Framework, ClickMagick and UTM tracking templates, a printable audit checklist, and vendor scorecard templates, all built around Philip Coble's buyer-first approach.

Every resource is designed for buyers who want to verify before they spend, not after. The solo-ad buyer's guide walks you through the full process, from vetting your first vendor to scaling a proven source. Download the checklist, set up your tracker, and run your next buy with the audit workflow in place from the start.
Useful sources and further reading
- How to Track Solo Ad Clicks Like a Pro | Ihsan Solo Ads — Covers ClickMagick configuration, UTC timezone sync, and burst-pattern detection.
- Advanced Solo Ad Vendor Vetting Checklist | Soloadsguide — The full 21-Question Vendor Vetting Framework with pro vetting tactics.
- Solo Ad Click Tracking Explained | Soloadsguide — Step-by-step tracker configuration and sub-ID naming conventions.
- How to Avoid Solo Ad Scams | Soloadsguide — Red-flag examples, dispute strategies, and evidence packaging for refund claims.
Recommended
- Solo Ads vs Paid Social Ads: 2026 Marketer's Guide
- Solo Ads Performance Benchmarks Explained (2026)
- Why Solo Ads Reduce Customer Acquisition Costs
- Are Solo Ads Still Worth It in 2026? Honest Assessment
Want Verified Traffic Without the Guesswork?
PulseTraffic screens every seller, filters bot clicks in real time, and shows you verified buyer traffic labels before you spend a dollar.